
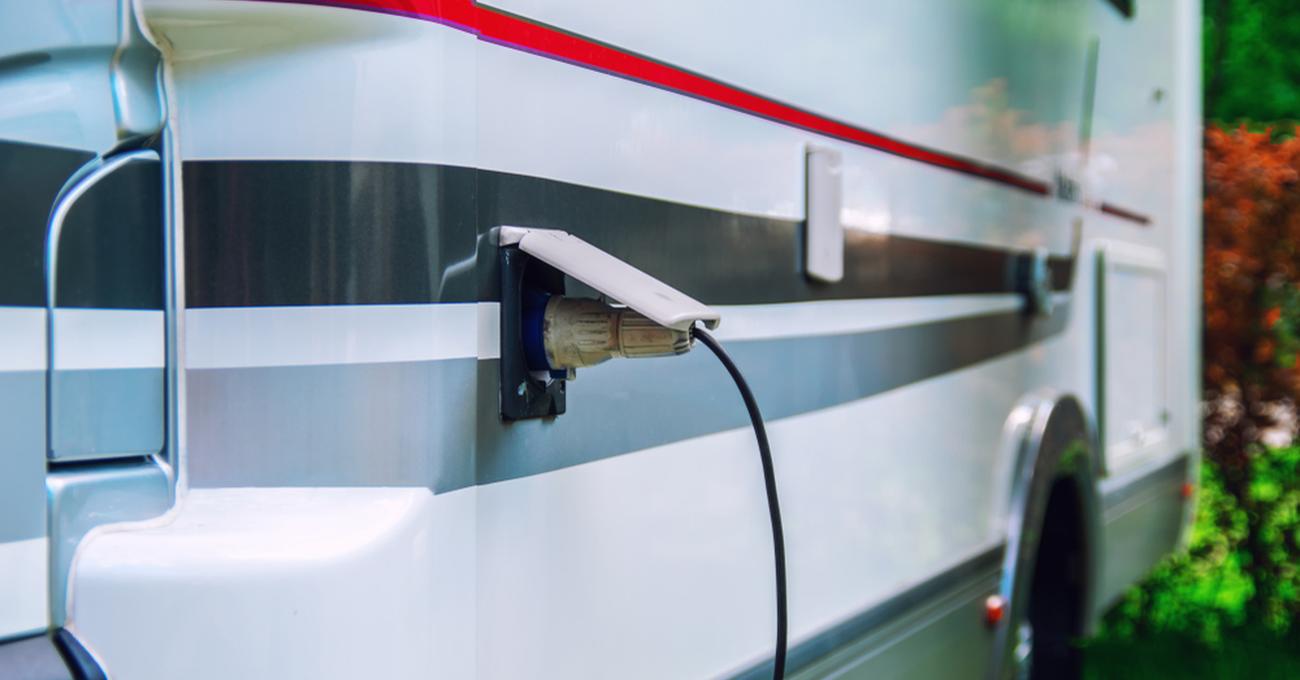
It’s fantastic to have the ability to keep your RV at home while not in use. It’s much better to have electricity in the RV to undertake upgrades, repairs, or essential maintenance comfortably. However, if your RV has a 50-amp RV connection, you’ll need a 50-amp RV plug wiring at home to charge it completely.
Many homes lack 50-amp RV plug wiring for powering an RV. As a result, most homeowners install one after acquiring an RV that requires 50-amp service. Fortunately, if you’re a savvy DIYer with electrical understanding, you can install a 50-amp RV plug wiring in most homes.
However, when you operate with electricity, remember to disconnect the power securely before beginning any work and become familiar with electrical terms and tools. Don’t do it yourself if you’re afraid of working with electricity. Employ a professional. If you want to install a 50-amp RV plug wiring at home, keep reading because we’ll walk you through the process.
Is It Possible to Connect Your RV To Your Home Without A 50-Amp RV Plug Wiring?
You may connect your RV to a house outlet if you don’t have a 50-amp connection, but you’ll be limited in what you can power in your trailer. A standard residential plug offers 15/20 amps, which is nowhere near enough to run your system.
Much power-hungry equipment, such as a washer and dryer or an air conditioner, will not work when plugged into a 15/20-amp outlet. You may, however, continue to power the lights, refrigerator, and other low-power equipment. For short-term use, you may obtain a 50 to 15/20-amp adaptor for your RV. However, please do not use it for a lengthy period.
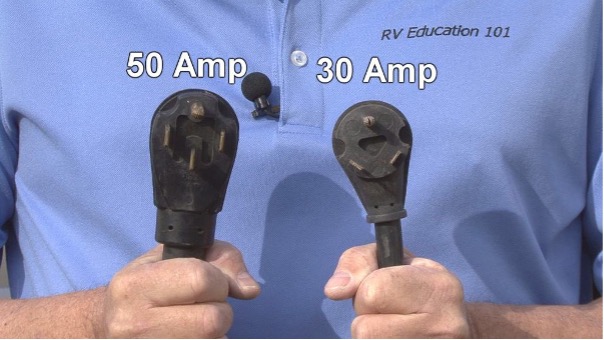
What Is the Difference Between 30 Amp and 50 Amp Plugs?
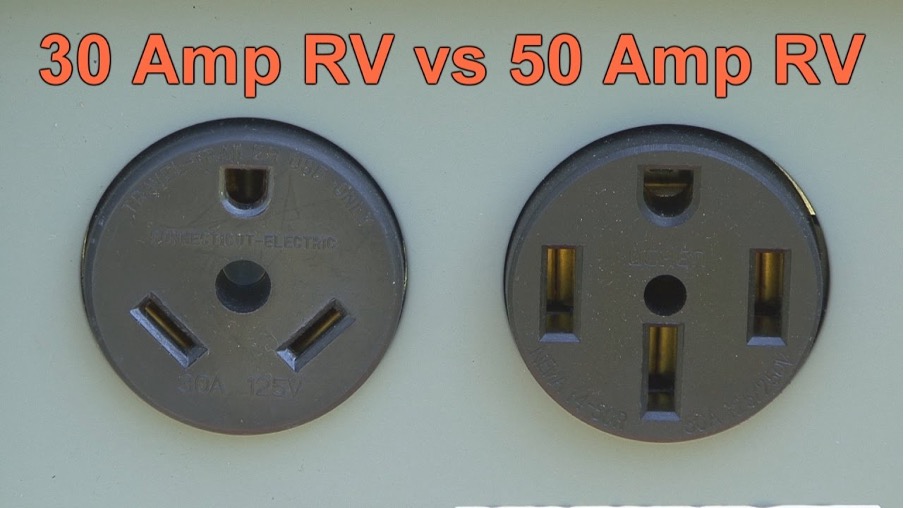
The primary distinction between a 30-amp and a 50-amp plug is what they can power. A 30-amp service is enough for RVs equipped with microwaves or a single AC appliance that requires less electricity. On the other hand, large RVs with two AC units, a washer/dryer, or a dishwasher will require a 50-amp RV plug wiring.
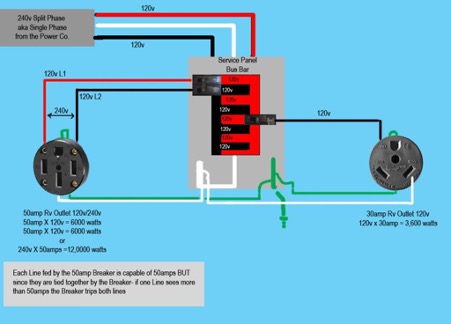
Furthermore, 30-amp and 50-amp connectors seem and function differently. A 30-amp plug features three pins: one for 120V, one for neutral, and one for ground. It can withstand up to 3,600W. Two 120V hot pins, a flat neutral pin, and a circular ground pin comprise a 50-amp plug. It can withstand up to 12,000W.
How Many Volts Can a 50 Amp Service RV Take?
Despite possessing twin hot pins, a 50-amp RV plug wiring can handle 120V. To enhance the voltage, the two hot pins are not joined. Instead, the two 120V hot plugs offer independent 50-amp, 120-volt feeds, allowing more incredible energy to be supplied to bigger appliances.
Hookups On a Pedestal or The Wall?
A 50-amp service can be installed with a wall mount, or a receptacle fixed on an RV power pedestal, such as at most RV parks. We recommend a pedestal since it allows you to place it closer to where you wish to park your RV.
A wall-mounted receptacle works well, but it may need extra work to cut into walls and determine how to attach it. Remember that a 50-amp plug is hefty and places a lot of strain on the outlet when plugged in and unplugged. It requires more support than a standard home outlet.
What Type of Wire Is Required For 50-Amp RV Plug Wiring?
For 50-amp service, you’ll need a UF-rated, six-gauge, four-conductor copper wire. The UF classification indicates that the wire is acceptable for outdoor use. The wire’s gauge indicates its thickness—the thinner the wire, the lower the number (i.e., six gauges is thicker than 10 gauge). A six-gauge copper wire may handle a 50-amp service.
There are four conductors in the wire core. The “hot” 120V connections are typically wired with red and black wires, a green ground wire, and a white neutral wire. Always have the proper tools and safety equipment for any DIY electrical task.
What You Will Require for the Job
Before we begin, you’ll need a few materials to install a 50-amp plug wiring in your RV.
- First, you’ll need an empty breaker box area for a 50-amp, double-pole breaker.
- Locate a new 50-amp double-pole breaker next. The hot wires are connected to this breaker through two handles and terminals. It has a larger footprint than a single-pole breaker.
- Ascertain that you have sufficient UF-rated six-gauge, four-conductor copper wire to connect the breaker box to the RV pedestal.
- A weatherproof RV pedestal hookup with a 50-amp (NEMA 14-50R) outlet is required. If you want to put it on the wall, you’ll need a separate weatherproof 50-amp (NEMA 14-50R) outlet.
- Next, obtain a one-inch diameter conduit for the cable and bury it at least 24 inches deep, as regulation requires.
- Finally, obtain wire staples or clamps to fasten the lines that lead to the pedestal and breaker box.
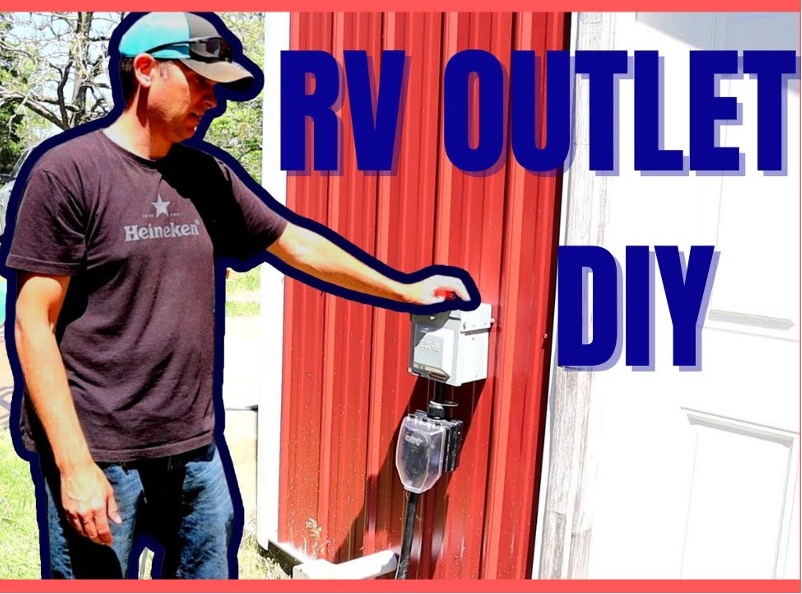
How to Install a 50 Amp RV Plug Wiring
Turn The Main Breaker Off.
Before doing any wire work, turn off all electricity to the breaker box. You should be able to locate a 100-amp or 200-amp main breaker that cuts power to the entire device. It should be noted that this will not turn off the lines that feed the main breaker; they will always remain active or hot. Hire an expert if you don’t know how to check for live power securely.
Set Up the Pedestal
Install the power pedestal in the desired place. Make that it is well-supported. A 50-amp RV plug wiring is heavy and exerts a lot of strain on the power pedestal when inserted and removed. To account for the weight, the pedestal must be securely mounted.
Install a New Breaker in an Unused Location
As previously stated, the breaker box must contain a room for a 50-amp, double-pole breaker. Install the 50-amp without touching the live wires connecting to the main terminals.
Connect the Wire to the Conduit
Before connecting the wires to the breaker and the pedestal, run them through the conduit. According to law, the cable must pass through a protective tube anyplace above ground and up to 18 inches deep. It can run anywhere without a conduit if buried at least 24 inches deep.
Connect The Wires to The Circuit Breaker
The green ground wire must be attached to the ground bus in the breaker box, then the white neutral wire to the neutral bus. Last, connect the black and red-hot wires to the terminals on the 50-amp breaker. It makes no difference which hot wire is connected to which terminal.
Connect The Wires to The Breaker’s Pedestal Switch.
Connect the other end of the wires to the pedestal after fastening one end to the breaker. Label the terminals on the back of the 50-amp outlet. The green ground wire has to be connected to the green terminal and the white neutral wire to the white terminal. Connect the red and black hot wires to the X and Y terminals. It makes no difference which hot wire connects to which terminal. Make sure the green and white labels are attached to the correct terminals.
Test Procedures
You may test your new power pedestal after correctly connecting the wire. First, switch on the main breaker, then the new 50-amp breaker. Next, check the power to the pedestal outlet with a voltmeter or non-contact voltage tester.
Should You DIY or Hire a Professional?
This may not be a difficult job if you are a handy DIYer knowledgeable about electricity. However, we cannot emphasize enough how important it is to be cautious while working with electricity.
When working with terminals, breaker boxes, cables, or other devices transporting live electricity, ensure the power is switched off. If you are unfamiliar with electricity or are concerned, see a professional.
We all want to save money, and many RVers handle their repairs and maintenance, but safety is more important than a few dollars saved. Professional installation will cost between $300 and $1,200. The cost is decided by the complexity of how and where you want the power pedestal to be placed.
Will You Provide a 50 Amp RV Plug Wiring?
Having a location to park your RV at home is beneficial while getting it ready for the road. However, giving it full power is much better. When you have control in your RV, it makes things much easier and more comfortable.
Furthermore, plugging it in keeps the batteries charged. Why not have power accessible if you have a place to store your RV? If you like, you can do it yourself with little effort. However, even expert installation will not be prohibitively expensive. Stay cautious and enjoy the power!