
Are you concerned about cleaning your RV’s black water tank? Not sure how to go about it? Find out more about it in this article.
Keeping your RV clean is the first step towards improving its functionality. As long as you choose the right cleaning solutions and the proper techniques to use them, cleaning doesn’t have to be a miserable experience. In addition, regular washing of your tanks can avoid further problems like odor, blockages, and bacteria buildup.
Here are some things that every RV owner may take to ease the cleaning procedure in order to prevent this:
Steps to Clean Your RV Black Water Tank
Whilst cleaning the RV water tank, one may come across several knobs and connectors. This may appear like it’s a lot to do, but it is simple. Here is how the RV tank can be cleaned:
Step 1: Pour Water off Your Blank Tank
Shut the black tank valve after you have drained the water out of it. Next, open the gray water valve and let the water flow out. This is done to clear the hose connected to your waste water tanks. The leftovers move into the septic system situated at the campground. When you’re finished, close the gray and black waste tank valves.
Step 2: Go Inside the Camper and Pour Water into the Tanks
Fill the sinks and the toilet with water. Open the valves in the same order as you’ve opened them before. The motive here is to clean the hose and the tanks.
In case you do not have full hookups, add some water to a water jug and pour it down the toilet and sink to rinse them for the second time.
Step 3: Treat your Tanks
This step is an optional one. However, treating tanks after you have dumped, flushed, and cleaned them puts a stop to future clogs, odors, and dirt buildup.
It is necessary to treat the black tank each time you dump it. But for the gray one, you need not worry about treating it every time you flush. With that being said, it is essential to find the right black water tank cleaner on the market for effective cleaning. The most preferred ones are enzyme-based solutions.
Step 4: Pressure Wash and Backwash Your Black Tank
When you are done cleaning your tank by following the above-stated methods, it is time to backwash or pressure wash the internal parts of the tank. This technique helps liquidate, soften, and break down debris or waste matter. This constitutes the final step of deep water tank cleaning.
Pressure washing and backwashing can be carried out primarily in three different ways. They are:
Built-in Technology
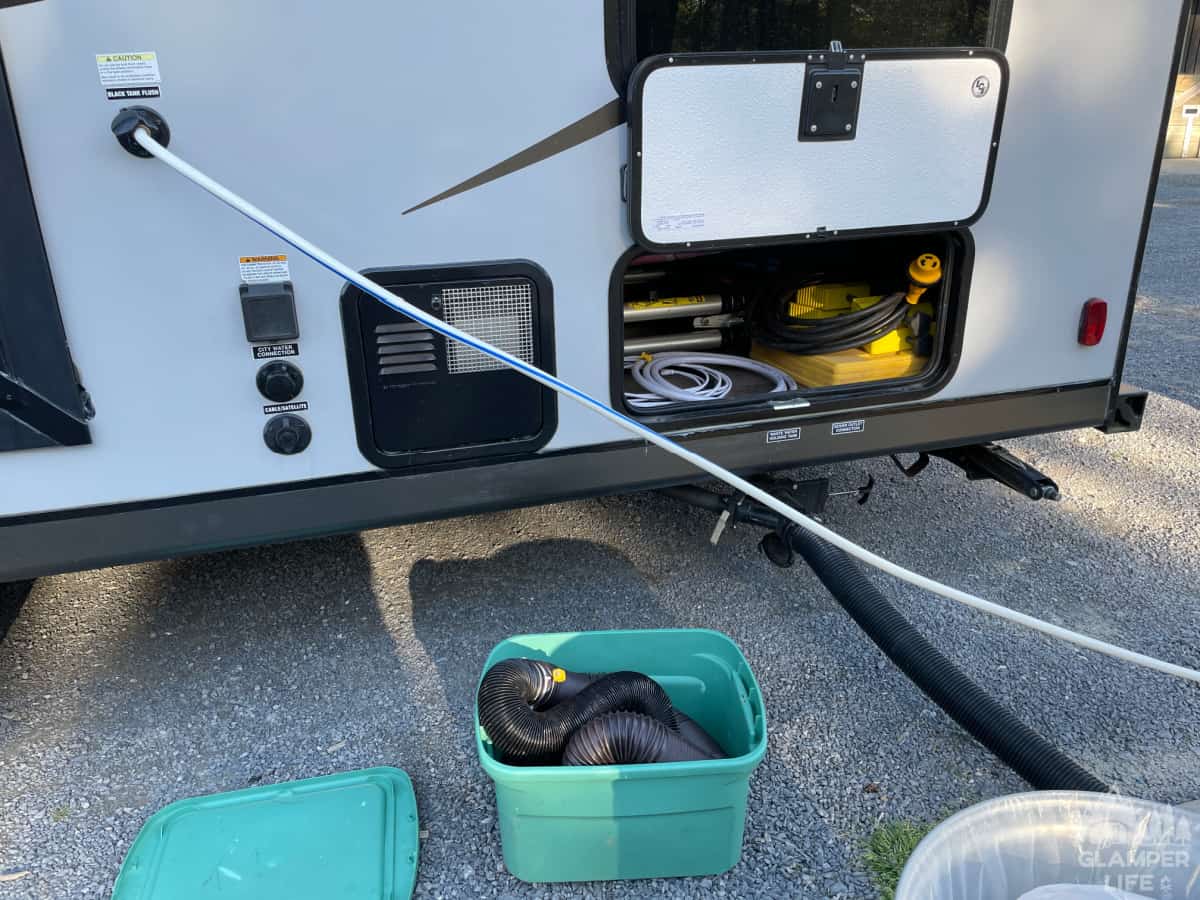
If your RV already has a backwash system, connect a garden or utility hose to the main connection and turn on the pressure washing or backwashing valve.
Make sure that there is water running when you are backwashing the RV tanks. Then, when it is visible that the drainage is clean and free of debris, the deep cleaning process has been completed.
RV Tank Cleaning Wand
You rely on the cleaning wand when your RV rigs do not have any built-in backwash systems. It is considered one of the best-known black water tank cleaner on the market. The wands are connected to the garden or utility hoses, which are operated by water spouts at home or at the dump or campsite.
Put the wand down the open toilet lid and into the tank to complete the deep cleaning. From the outside, keep the water running. If necessary, you may seek assistance in turning on the water. As the water starts to spray out from the wand, move it around to reach every corner of the tank. From the outside, someone should keep a check on the water drainage and ensure that it is free of debris and easy to see. Only then can we consider that the job is done.
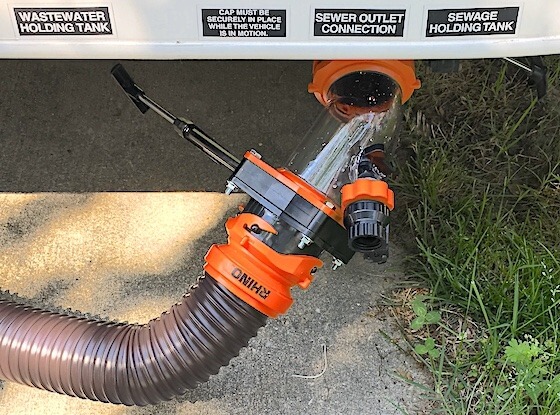
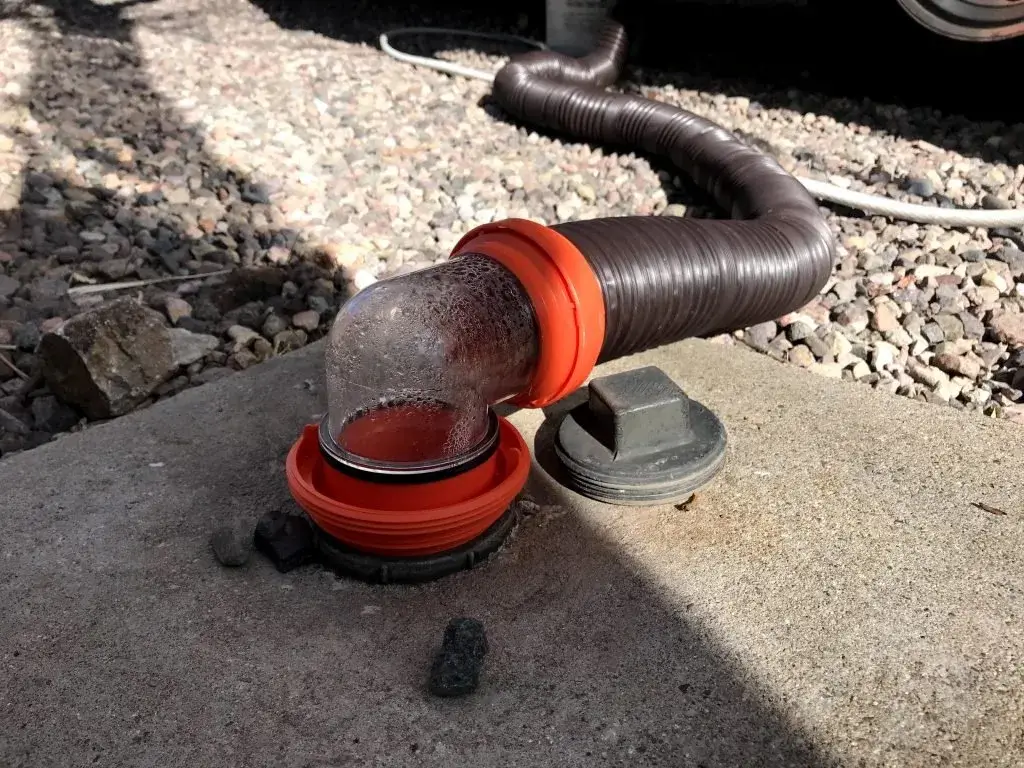
Hydroflush
Hydroflush is a transparent, hard piece of plastic that’s attached to your tank valve. This helps you see how your tanks are getting flushed. Then, when the freshwater runs out, you will know that the job is done.
The RV hydroflush has a fitting coming upward from its lower part, connecting to the garden hose and performing its function. Join the hydro flush to the tank valve once the RV tanks are empty. Next, connect the drainage hose to the lower fitting of the hydroflush. Finally, attach the garden hose to the hydroflush and begin blasting. Make sure that your black tank valve is open.
How Often Should You Flush Your Black Water Tank?
There is no hard and fast rule for how many times per year you should flush your tank. Instead, it depends on factors like the size of the tanks or how many people have used them. It also matters how much you allow your tanks to get full prior to dumping them. For example, some RV users go by the 2/3 rule, while others wait for the tanks to get absolutely full.
If you are moving alone or with just one person, you can manage by flushing your tanks once a week. But with a larger group, you will need to flush your tanks as frequently as every day or so as per the requirement.
Essential Maintenance Tips For Regular Dumps In Your Tanks
There are a few maintenance tips you must keep in mind before flushing your tanks at a dump site. They are:
- Every time you wish to flush or clean your tanks, start with the black ones.
- Keep away from using freshwater hoses as a blackwater tank cleaner or for sewage rinsing.
- Use the soapy water from the gray tank as a black water tank cleaner.
- Dump the tank until it is two-thirds full.
- If the dumpsite is in high demand, be patient and courteous. Let someone else do it first while you can treat your tanks.
- Carry a clean and extra hose with you to the dumpsite in case they do not have one available at the moment.
- Ensure the black water valve is cleaned before going back to the camp.
- You should remember to dump tanks into the drainage pipes and clear the mess (if any) caused by you. The idea is to leave the site clean.
- Wear rubber gloves or a face mask for personal protection.
Deep Clean Tips for your RV

Here is a list of some deep cleaning tips before storing your RV and for its monthly cleaning:
- Deep cleaning Once every week while running the RV will make your pre-storage tank and deep cleaning more efficient and quicker.
- Dumping often (as required) will make your pre-storage and deep cleaning more manageable.
- For effective deep cleaning, remove debris and drain your tanks like you usually do. Drain the tanks too.
- After the tanks are drained, fill about 3/4 of the container and add approximately two cups of bleach. Keep the toilet lid closed to prevent toxic fumes from entering the air.
- Drain the tank again after 5 to 10 minutes. Pour water again. Drain the water again.
- Repeat the process and fill the tank with clear water. Allow the water to drain until there is no debris or dirt left and the bleach smell has completely gone away.
- Make sure to rinse all the bleach away properly so it does not disrupt your plumbing system.
Can You Use Bleach As an RV Black Water Tank Cleaner?
If you are wondering whether or not to use bleach as a black water tank cleaner, then the straightforward answer is yes. But what matters here is how much bleach you use and how often you use it.
Many RV users mix about a few caps to a quarter of a cup of bleach powder with a gallon of water about black water tanks. It is sufficient to get your cleaning and sanitizing going without causing any harm to your hoses or plumbing system. You can even safely dispose of it at the dump site.
Bleach can also be used to treat gray tanks. One to two caps of bleach is good enough to clean the gray water tank and reduce unwanted foul smells and bacteria.
Tanks can be cleaned thoroughly with bleach if you are careful enough to use them as recommended. However, excessive use of bleach or a high concentration of it can severely harm your RV plumbing system.
Conclusion
You can implement multiple hacks and steps to keep your black water tank clean and get it running smoothly.
There are many tools through which this can be attained. All you need to do is find the one that helps you keep the awful smell at bay, wastewater sensors running, and waste water draining away, and you’ll be good to go!
1 thought on “A Step-by-Step Guide to Cleaning Your RV’s Black Water Tank”