
If you are a travel enthusiast, at some point in your life, you must have certainly considered buying or renting an RV for your vacation. There are many things to take into account while planning a trip to make sure you have the greatest vacation possible, irrespective of whether you have rented an RV or bought one for years of future travel.
RV can be extremely fun and rewarding, but it has its own set of challenges. Sewage dumping is one of the major challenges. You will eventually need to get down and dirty and empty the holding tanks for gray and black water. RV camping requires “dumping” or “connecting to the sewer,” which are terms for connecting your RV to a sewer line to dispose of your waste properly.
You will need to understand how to install RV hookups on the property.
How to Hook Up Your RV to a Sewer Line
An RV sewer system is responsible for collecting and disposing of the waste that is collected from the RV, including water from the sink, shower, toilet, and basin. It is a concealed and self-contained system so that you can travel comfortably without having to make frequent stops for showers and to use the toilets. Here is a step-by-step guide on connecting your RV to a sewer line.
1. Right Location & Equipment
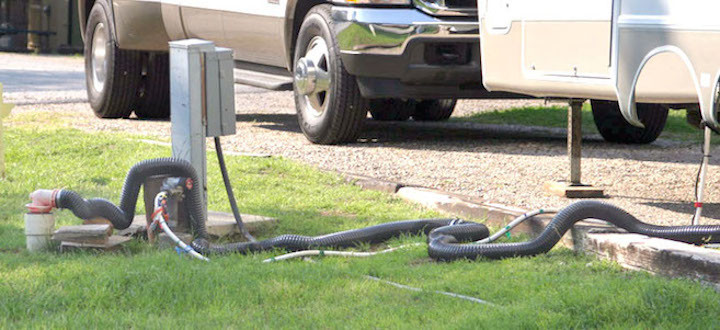
Park your RV in a designated campsite that has sewer hookups. Ensure this site has a sewer connection point with a sewer pipe opening.
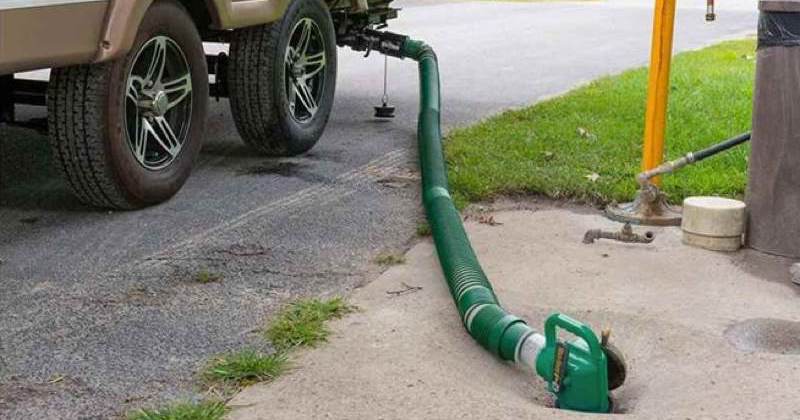
- Sewer Hose: A sewer hose is a flexible hose that connects the RV’s dump valve to a sewer pipe or a dump station. It is used to transport waste from the tanks to the sewer system.
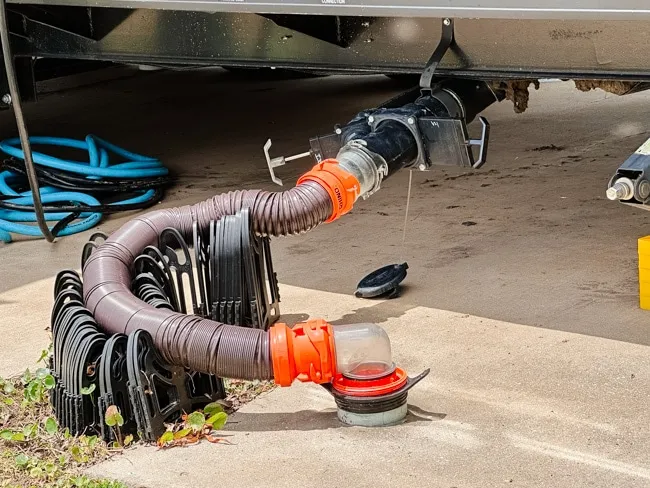
- Sewer Hose Support: This keeps the hose off the ground, allowing for proper drainage and preventing clogs.
- Gloves: Disposable gloves help protect your hands from contamination.
- RV Sewer Elbow: An RV sewer elbow is attached to the RV’s dump valve. It provides a more secure connection point for the sewer hose.
- Sewer Hose Seal or Donut: This creates a secure seal between the sewer hose and the ground’s sewer pipe opening.
2. Prepare the RV
- Locate the RV’s waste outlet. It’s usually at the rear of the RV.
- Attach the RV sewer elbow to the waste outlet.
3. Prepare the Campground Connection
Place the sewer hose seal or donut over the campground’s sewer pipe opening to create a tight seal.
4. Connect the Hose
- Connect one end of the sewer hose to the RV sewer elbow and secure it in place.
- If the campground has a raised sewer connection, use the sewer hose support to keep the hose off the ground.
5. Secure the Other End
Connect the other end of the sewer hose to the campground’s sewer pipe opening. Make sure that you secure the connection by twisting it into place.
6. Open the Valves
- Open both the gray water valve and the black water valve on your RV.
- Gray Water Tank: This tank holds wastewater from sources like sinks, basins, and showers. Gray water is relatively less contaminated than black water (from toilets), so it can be handled less intensely.
- Black Water Tank: This tank holds waste from the RV’s toilet. It contains human waste and is treated separately due to its higher level of contamination. The water from your kitchen and shower will also end up here if your RV does not have a gray water tank.
7. Monitor and Drain
Keep an eye on the draining process to ensure there are no leaks or issues.
8. Rinse and Clean
- After the tanks are emptied, close the valves on your RV.
- Use a dedicated hose (not the same hose used for drinking water) to rinse out the sewer hose. Some campgrounds provide a water hose for this purpose.
- Close the sewer pipe opening and disconnect the hose.
9. Store the Equipment
Rinse and store the sewer hose and other equipment in the specific storage area, keeping them separate from other items.
What are The Parts of an RV’s Sewer System?
The main parts of an RV’s sewer system have been explained below.
- Freshwater Tank: You add clean water to the freshwater tank. It is what comes out of your toilets, showers, and faucets.
- Black and Gray Water Tanks
- Toilet: RV toilets are designed to use less water and fit into the small spaces in the vehicle. They often have built-in flush mechanisms that allow waste to be deposited into the black water tank.
- Flush Mechanism: In RVs, toilets often have a foot pedal or button to flush waste into the black water tank. This helps control the amount of water used and prevents splashing.
- Dump Valves: Each tank has its dump valve. These valves are opened to release the contents of the tanks into a sewer system or a designated dump station.
- Sewer Hose
- Sewer Hose Support
- RV Sewer Elbow
- Sewer Hose Seal or Donut
- Sewer Vent and Roof Vent: RVs have a venting system that prevents the buildup of gasses in the tanks. The sewer vent allows the gasses to escape safely from the system.
- Tank Rinse System
Conclusion
You must take your RV to a proper dumping station, like a commercial campground, state park, or national park, to dispose of the waste. Never dispose of the sewage in the wild or through drain pipes.
The size of your tank and how frequently you use the facilities will determine how often you will need to empty it. However, as a rule, you should not dump your sewage until your tank is at least two-thirds full. When the tank is full, gravity helps drain the waste tanks.
Now that you know how to hook the sewage system of your RV to a sewer line have fun traveling!