
You may have thought of wiring your own 30 AMP RV outlet if you own an RV. It has become a necessity as people often go on long road trips or camping and wouldn’t want to end up breaking down in the middle of the road.
What Does a 30 Amp RV Plug Look Like?
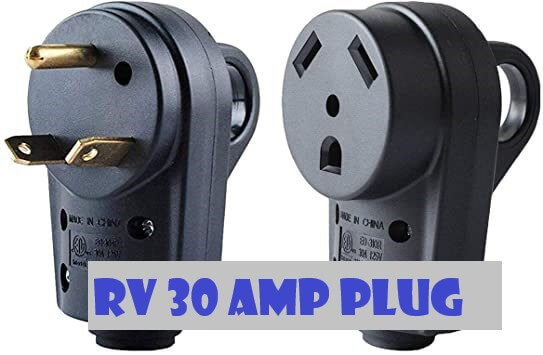
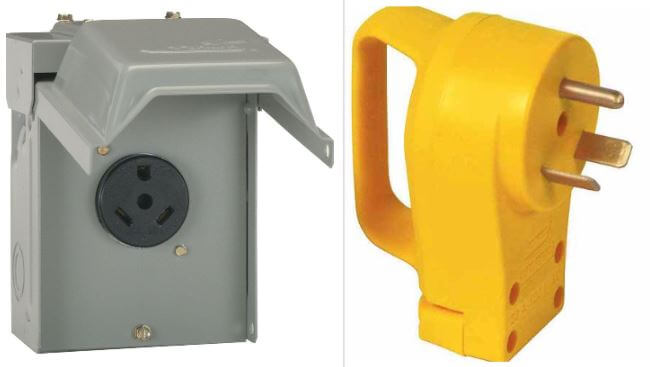
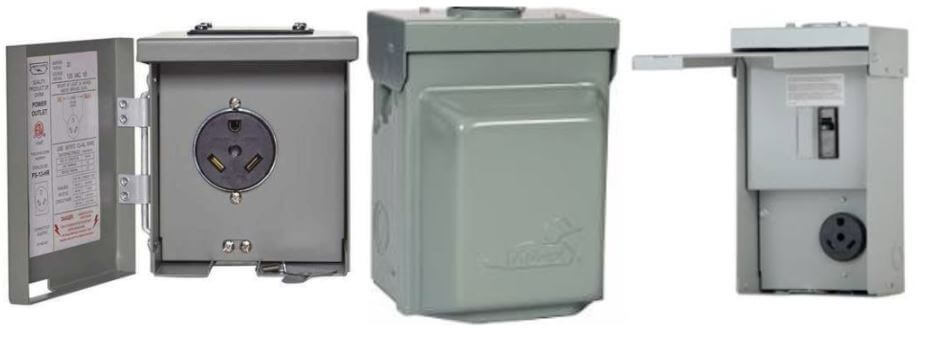
Well, you must have thought about the structure of a 30 Amp RV Plug and how it would look like. To make it simple and quick, a 30 Amp RV Plug looks like just another plug with three prongs for ground, for life, and for the neutral position. The same is the case with an RV Outlet, which provides you three slots to insert all the prongs on a 30 Amp plug. Mainly, it has been observed that a 30 Amp RV Power service can offer 120 volts power supply which is treated as quite extraordinary for an RV.
What Do You Need to Wire Your 30 Amp RV Outlet?
So, as you are now aware of what a 30 Amp RV Service is, we will now look at all the materials that are required to wire your 30 Amp RV Outlet. Mainly, there are three to four things that are required to complete the task, including a 10-gauge wire, an electrical safety kit, a brand-new breaker, an RV cover plate, and staples that will be used in protecting your 10-gauge wire. Once you collect all these items together then, you will be ready to wire your own 30 Amp RV Outlet without any issues.
How to Wire a 30 Amp RV Outlet?
To begin with wiring your own 30 Amp RV Outlet, there are a few steps that need to be followed. However, once you follow all the steps carefully, you will then realize how easy it was to wire your RV Outlet. So, without wasting time any further, let us dig deeper to understand how we can wire our own 30 Amp RV Outlet.
Step 1: Get a box cutter and use it to cut the outer portion of the cord’s jacket cover carefully. You can quickly leave around one inch to separate the 3 wires. Well, while doing this, try not to damage any insulation that is covering the wires. Otherwise, it will get damaged and then will not work correctly.
Step 2: Once you are done cutting the outer portion of the cord’s jacket, you can move on to the next step, which is to remove around half an inch of insulation from all the wires and twist the strands. It will help create a rope-like thread stronger than the original strands that are not twisted.
Step 3: While performing these steps, ensure you do not damage the brass pins when you draw them out from their housing. Make sure that you do not trim them by mistake.
Step 4: Color code all the links and ensure that each link is connected to the cable correctly. Otherwise, it would not work, and it will take time to understand where the connection went wrong as many wires are involved. So, the hot wire is black, and it has to be connected with the screw that is brass colored. Then you will find a white neutral wire that has to be placed with the silver-colored screw.
Step 5: After making the connections as per the above step, now you have to connect the ground wire that is green in color to the green-colored screw. However, if you do not find the green screw, you can connect the ground wire to the U-shaped pin.
Step 6: The last step is to tighten all the small straps on the cords over the jacket on the top. Ensure you secure the wires inside the 30 Amp RV Plug. This is the main step, and try not to forget this step because if you did, then the whole circuit would be useless, and it would not work.
How to Plug 30 Amp RV Cord into a 50 Amp Power Pedestal?
You can plug a 30 Amp RV Cord into a 50 Amp Power Pedestal. However, many people do get worried that the extra power that the 50 Amp Power Pedestal supplies could harm their RV’s electrical system, but that is not the actual case.
You can perform this task as usual, and it would not harm any machinery of your RV. You only need to ensure that you use the correct 30 Amp to connect with the right 50 Amp adapter, and then everything will be done without any issues.
You can use the female end of the adapter to plug into your RV’s vehicle cord and the male end of the adapter into your 50 Amp RV Receptacle, and you are all set.
How to Wire a 30 Amp RV Plug?
As you have now learned how to wire your 30 Amp RV Outlet, you can now easily wire your 30 Amp RV Plug without any significant issues. So all you need now is to follow the steps that are mentioned below carefully, just like you did for your 30 Amp RV Outlet, and then you are all set to wire your 30 Amp RV Plug as well.
So, as you are now aware that there are three different prongs on a 30 Amp RV Plug, one is a 120 Volts wire, the other one is a hot wire, and the last one is a ground wire. So now, wire the live, positive, or hot wire to the live prong on your plug.
Now, after completing the first step, connect the neutral wire to the neutral prong on the plug. This is easy to guess as this wire is usually of white or grey color.
Now, the ground wire has to be connected with the ground prong on the plug, and you are all set to go.
What Size is the Breaker Needed for Wiring the 30 Amp RV Plug?
The first and foremost thing to remember is that a 30 Amp RV Plug must be used with a 30 Amp Breaker. You can try to plug it in a 15 or 20 Amp Breaker, but that could risk damaging the RV if the power supplied didn’t match the connection you made. So, please go with the 30 Amp Breaker only so as to avoid any kind of damage.
Conclusion
So far, we have learned almost everything about wiring a 30 Amp RV Outlet and how it can be done without fussing over any issue.
The main thing to remember is that all the connections that you are making for your RV must be correct. If not done so, then it can result in major damage that could also affect your RV.
So, please go through the steps two-three times just to avoid any confusion and then make the connections in the right manner.