
Usually, when you have a 50 amp electrical system, be it a breaker or plug, it will consist of a wire and four-pin configuration. Of these, the two wires or pins are 120-volt hot pins; another is a round ground pin, and then a flat neutral pin. The hot wires in the hot pins are color-coded red and black. On the other hand, the neutral wire is white, and the ground wire is green.
But if you have a 3-wire 50 amp plug common in welding, then how do you know which is the ground wire and which are the other wire configurations? Also, wiring a 50 amp plug can then seem confusing.
So, here’s a quick guide to help you figure out the wire configurations and how to use the wiring of a 50 amp welder plug.
Two Types of 3-Prong Outlets
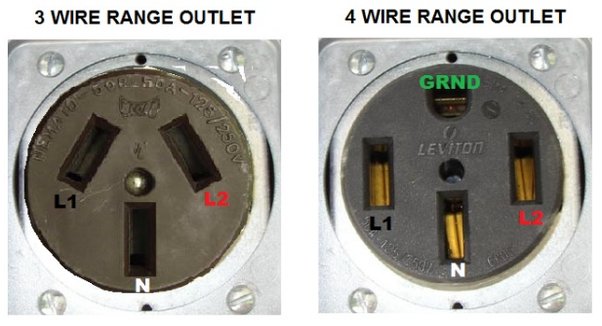
Many people who don’t deal with electricity daily aren’t aware that there are indeed two types of three-prong outlets; therefore, let’s first understand the two types of 3-wire 50 amp plugs.
If you have an appliance that utilizes 110V power, it will require the first type of 3-wire 50 amp plug where there will be two hot wires and one neutral wire. The hot wires will be either red or black, and the neutral wire will be white.
On the other hand, if equipment or appliance runs on 220V power, then the 3-wire plug will have two usual red or black hot wires and a ground wire, which is either bare copper or green insulated wire. In this setup, the neutral wire is not required.
What Do You Need to Wire a 3-Wire Plug?
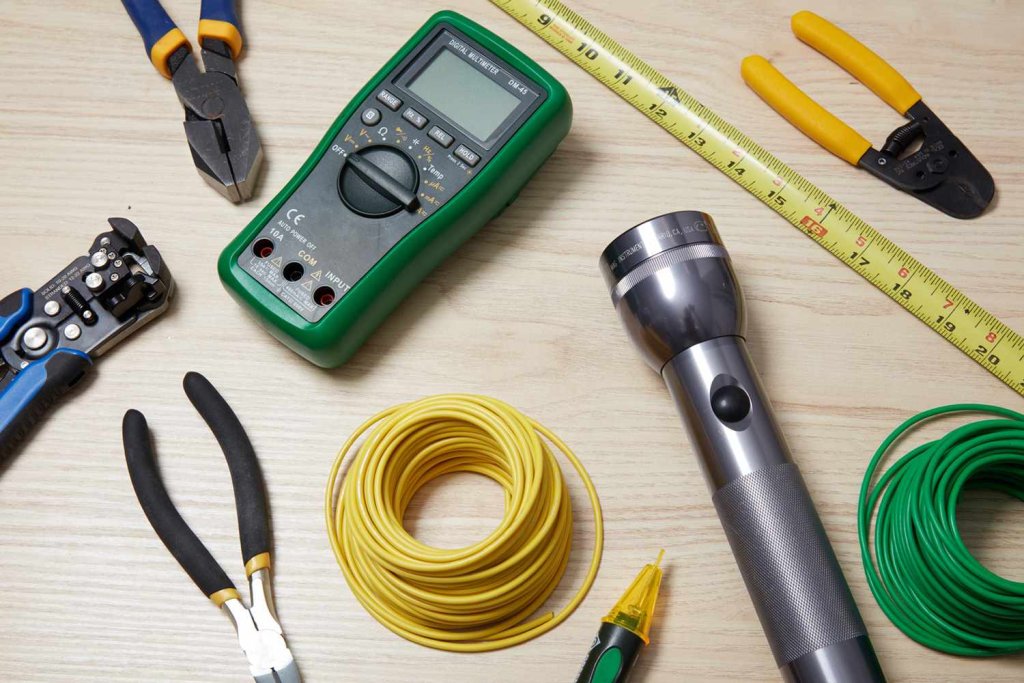
Here is a list of supplies you need for wiring a 3-wire 50 amp welder plug.
- Voltmeter – This is used to ensure that the power is off.
- Screwdriver – A screwdriver can be employed to terminate wires.
- Wire Strippers – Wire strippers are used to strip the insulation off the single wires.
- Electrician’s Tape – The electrical tape can be used to cover the outlet around termination screws to provide another layer of safety.
- Utility Knife – With the utility knife, the outer cover of the wires can be removed to expose the individual wires.
- Wire Crimpers – Crimpers can be used to crimp a ring lug at the end of the wire to be able to remove the screw from the receptacle.
Steps to Wire a 3-Wire 5 Amp Plug
Read the quick guide to know how to do the wiring of a 3-wire 50 amp plug.
Step 1: Determine the Wire Size
To carry a 50 amp current and provide an adequate output of power and voltage, you have to use a 6 AWG wire. However, if the current has to be carried over a large circuit, you must use a 4 AWG wire to ensure that the right power is yielded even after the resistance is encountered.
Step 2: Check that There is No Power
Now, cut off the power supply, and to ensure that the power is off, test it with a voltage meter. You need to use one probe and touch it to one end of the hot wire while keeping the other probe in contact with the ground wire. If the meter shows zero volts, it indicates the power is off correctly.
Step 3: Remove the Outer Cable Jacket and Terminate
Now, use the utility knife to remove the outer cable cover carefully. Now, strip the wired ends with the ring lugs. Just strip it enough to slide the barrel of the ring lug over the stripped wire.
In case you are wrapping the wire around the screw, you will need to strip at least up to 1 inch of the insulation.
Step 4: Crimp the Ring Lugs
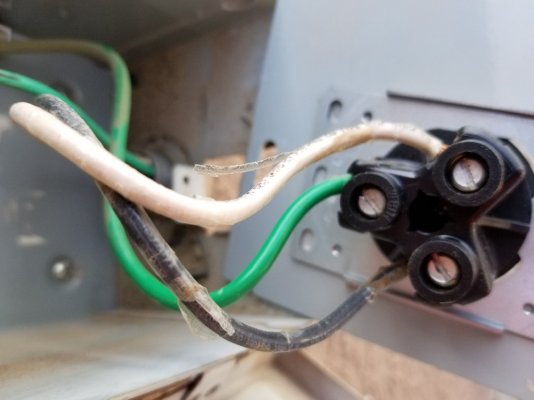
Next, crimp the ring lugs on the three single wires. Finally, terminate the wires to complete the new connection. Once done, ensure to slide the lugs over the hot wires and screw them back to the receptacle. Now locate the third screw and if it’s a green one, then take the green or bare wire and hook it up.
Ensure that no insulation is pinched under the screw; otherwise, it will lead to loose connection problems.
Step 5: Verify
Now double-check everything, and if everything appears to be right, then wrap the electrical tape around the plug to cover the screws and any bare wire. After this, place the lid back and then turn the power on.
Concluding Thoughts
With this, we wrap up this piece on how to wire a 3-wire 50 amp welder plug. We have also guided you on the types of 3-wire plugs and how to determine which is the ground wire in such types of plugs.
So, hopefully, you will no longer struggle with 3-wire plugs when you have to deal with one in place of the usual 4-wire 50 amp plug or breaker circuit. Also, remember to verify if there is any power on the wires before you initiate a wiring process to ensure your safety.