

With the changing seasons, just like your house your RV also needs some maintenance to keep itself away from the ruins of time. When the temperature drops, many people prepare themselves for winter. From the camping season to the cold season, you also have to prepare your RV for every climate.
As many say that prevention is better than cure, winterizing your RV is one such prevention. It can look like a tiresome activity to perform but in the long run, it is the best thing you can ever do for your RV. This process can save you many bucks and you can do this all by yourself.
The Tools You Need In This Process
Before starting any work, we have to make sure that we are well-equipped. We have to gather all the tools and supplies to make sure that the process goes smoothly without any challenges. So, below we have listed very important tools that you should have, to winterize your RV.
- Flashlight
- Plastic plug or new anode rod
- Cordless power drill
- Socket wrench
- Screwdriver or needle-nose pliers
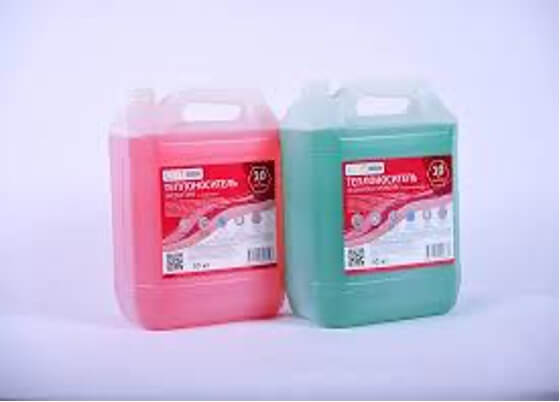
- RV pink antifreeze [at least 2 jugs]
- A set of open-end wrenches and two crescent wrenches
- Siphoning kit, unless your pump already has one
- Water heater bypassed kit unless your RV already has it
If you choose to opt for the air compressor method, then you need the following tools:
- A tankless air compressor
- A blow-out plug
- An adjustable water pressure regulator
Steps To Winterize Your RV
We have curated a special step-by-step guide, which will help in making your journey of winterizing your RV easier. It can be overwhelming in the beginning but the result would be worth it. So let’s make your RV life easier and safer by providing you with the steps below.
Plumbing is very crucial in getting your RV ready for the winter. Even a little water in your pipes, faucets, valves, or pumps during winter can freeze, expand, and split apart. And since most of the plumbing is inside the walls and interiors of the RV, it can destroy the system.
Generally, there are two methods with which you can make your RV’s plumbing system ready for the cold season. First, is the Antifreeze method, and second, is the Air Compression method.
The Antifreeze Method
This is the most commonly used method when it comes to winterizing the RV plumbing system. So let’s start this process, shall we?
Drain The Water-Holding Tanks
This step is a no-brainer. Every RV-er follows this step regardless of the RV’s model or shape. In this step, we have to remove all the water from the system. Let’s first start with the freshwater tank. And then move to gray and black tanks to empty the water from there. Make sure that there is no water left in the tanks. After this, flush out both tanks.
If your RV does not have a built-in flushing system, you can use a cleaning wand or external flushing system to clean out the black waste from the tanks.
A bonus tip would be to do this activity at a dumping station or campground.
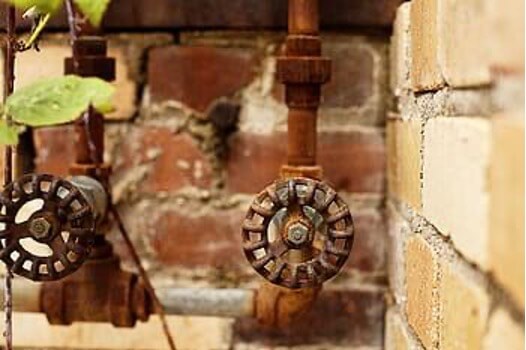
Draining The Hot Water Heater
Make sure that the water is cooled down completely. Then drain out the entire tank. To do this, first, open up the pressure relief valve. You can remove the anode rod or drain plug, whichever the hot water heater contains. Please stand at a distance when the water is draining out to prevent some serious damage.
Check if the anode needs replacing. Also, at this point examine how the cleaning of the tank will be whether with vinegar or a tank rinsing wand.
Remove Water Filters
You need to remove any inline water filters that are installed. This step will ensure that they are clean and ready to use when you install them for the next trip season. You should also check if any of the filters are expired or need replacing.
Remove All The Drain Plugs And Open All The Faucets
In this step, make sure to remove all the drain plugs of your RV. Then open all the faucets, both cold and hot, which will help in draining from interior water pipes. The minimum time required for this process would be fifteen minutes.
Look out for low-point water drains and open them. If there is any water left in the lines, make sure to get it out through the water pump. But do not run the water pump for more than a few seconds as it can increase the risk of damage to the water pump.
Remember to close all the drain plugs and faucets once the water is drained out.
Bypass The Hot Water Heater
We also have to take care of the water heater during winter. Most RVs have the hot water heater bypass kit already installed. This step will ensure that the hot water heater does not get filled with antifreeze as it is unnecessary. This is a smart way to not waste your antifreeze in a place where it is not needed.
If your RV does not have a bypass system then you can purchase and install it yourself. Otherwise, you can take professional help as well.
Running Antifreeze Through Water Lines
The savior of your RV’s plumbing system in winter is Antifreeze. Now what you need to do is install your water pump converter kit to allow RV to pump antifreeze into the system. If you do not have this device then disconnect one of your water intake lines and throw it into the jug of antifreeze. You may need to require more tubing for this method.
Turn On The Water Faucet Closest To The Water Pump
Turn on the water faucet closest to the water pump and let the water trickle down until you see Pink water coming out. Pink is the color of the antifreeze. Then, turn the hot water on until you see pink as well.
Repeat This For All The Sinks
Move to all the sinks and repeat the above-mentioned step until you see pink antifreeze coming out from all the hot and cold faucets. Don’t forget the outdoor shower if you have any. Replace the antifreeze jugs when necessary.
Flush To See Pink
Once the pink water is flowing out of all the faucets, make sure to check the toilet too. This will ensure that your water system is winterized.
Pour In Some Antifreeze
This step will ensure that the antifreeze has reached all of the plumbing lines and gray tanks. Flush the toilet a few times to ensure that the antifreeze is reaching the black tank too.
The Air Compression Method
This is an easy method but requires some special tools to perform. To make your life a little easy, we have made the list of steps with utmost clarity on how to winterize your RV’s plumbing system by using the air compression method.
- Disconnect your RV from the outside water source.
- Bypass your water heater. You don’t have to drain the water heater this time. Some RVs come with the pre-installed kit, if yours don’t have one, then make sure to install one.
- Consult with the owner’s manual for your washing machine, refrigerator, and dishwasher for the winterizing
- Open all the faucets including the tub and shower, and outdoor shower if you have one. Then open the system drain valves and let the water drain out.
- Flush the water to clear out any water from the system.
- Connect the Blow out plug to the city water inlet and not the fresh water tank.
- Keep the air compressor to not more than 30 psi, as it will prevent any damage to the water lines.
- Connect the air compressor hose to the blowout Turn the compressor on and let it run until all the water is drained out from the faucets and valves.
- Shut off the air compressor and disconnect the blow-out plug from the inlet.
Clean and flush your black and gray tanks, and drain the fresh water completely out of your RV. Pour one quart of Pink Antifreeze into both tanks to protect the drain valves and seals. Do this through the entire sink and shower drains. Add a pint in the toilet bowl to protect the flush valves and seals.
RV Maintenance Tips for Winter
Tires
It is a very important part of your RV and should not be forgotten during the cold season. Make sure to cover your tires to protect them from the weather. You can purchase tire covers also. Also, be sure to park your RV on wooden blocks or raise the tires completely off the ground or concrete surface. This will prevent the tires from becoming flat and also protects them from sinking.
Engine
Remember to top off the fuel tanks to prevent condensation. Make sure to add a fuel stabilizer. Let the engine idle for a few minutes to allow the stabilizer to make its way through the system. Fill the radiator with automotive antifreeze. Check the oil, brake fluid, and windshield washer solution. Follow these steps so you don’t have to worry next spring about the repair bills.
Batteries
Make sure that the batteries are fully charged. And remove all kinds of batteries from the RV during winter and store them in a dry location.
Electrical Systems
Disconnect your RV from power. Flip off the RV’s main circuit breaker. Remove batteries from clocks, alarms, and radios. Disconnect all the electronics like TV, stereos, ovens, etc.
Propane
Fill all the propane tanks. When the winter season is at its peak, propane tanks should be removed and kept in a remote location away from RV. cover the tank connections fitting with plastic and rubber bands to protect them from any insects.
Interior
Clean all the devices like the oven, stovetop, refrigerator, and cabinets too. Keep a fresh box of baking soda in the refrigerator. Make sure it is dry and clean.
Remove all the foods and beverages from the RV. Also, take all the clothing from the RV for laundering.
Check for any holes or vents or openings as insects can enter through them. Cover the gaps and holes with screenings or aluminum foil.
Before closing up, open a box of moisture absorbent and place it on a flat surface in the RV. It will remove dampness from the air and remove corrosion. It is easily available.
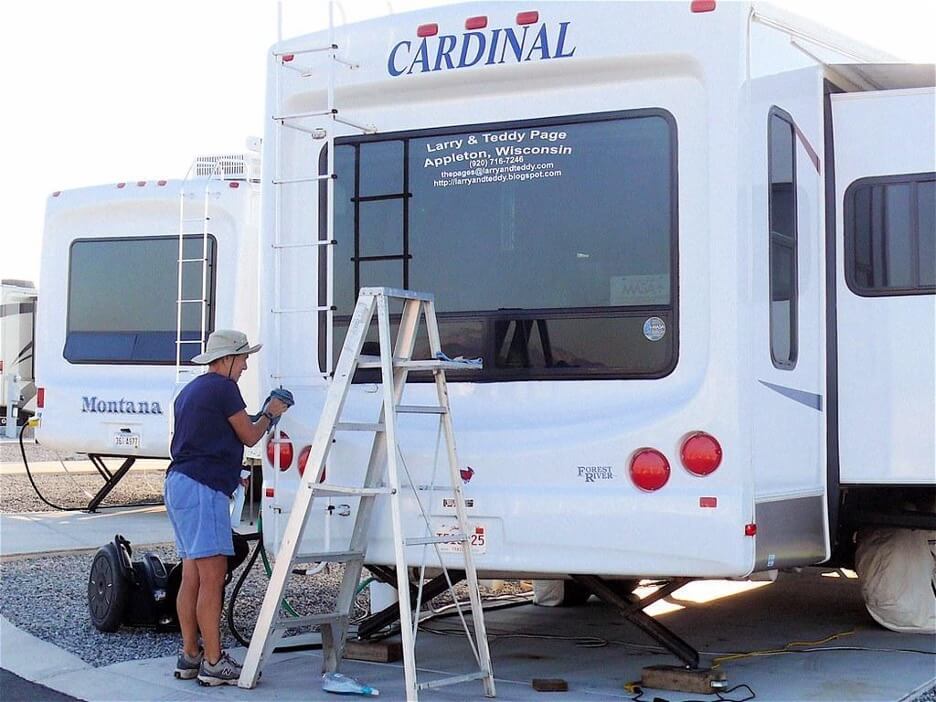
Exterior
Check seals around doors and windows. Clean them properly. Also, extend and clean the Awning using a special awning cleaner.
Now you know completely how to winterize your RV without any problem. Protect your RV this winter with the tips shared above. Also, give your RV some break so that it can make your trips more memorable and exciting.